How to Download Instagram to PC with Windows 10

You may not know but you can now download Instagram to PC with Windows 10. We’ve compiled an essential guide on how to download and install the Instagram Windows 10 app. We’ll also go through how to upload, edit and post photos straight to Instagram from Windows 10.
UPDATE: Trying to post to Instagram from your PC? Check out our how-to-post on Instagram from PC guide instead.
How to Download and Install Instagram with Windows 10:
- Open the Microsoft Store app
- Search for the Instagram app
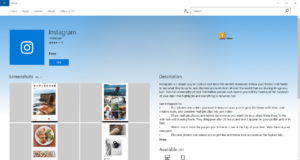
- Click ‘Get’ and download
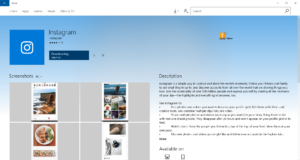
- Once installed, open the app and login

- And you’re in! Enjoy Instagram on your Windows 10 desktop

Other ways of using Instagram on Desktop
Not a Windows 10 user? Not to worry, you can also download Instagram to your Mac or use a third-party tool to easily manage and track your Instagram accounts. You may also opt for using Instagram browser, were no installation is needed and you can publish content to your profile. Keep in mind that features are limited, like for example posting a reel or creating collab posts.
You may have heard of popular social media scheduling tools like Later and Buffer. Although maybe the most known, there are other apps that you may want to consider due to their ease of use and enhanced features that can take your social media game to the next level.
Take for example Hopper HQ, where you can seamlessly schedule and autopost Instagram posts, reels and even Stories. Allowing you to focus your precious time on what matters, content creation.
Why Consider Hopper HQ Instead?
- Autopublish Posts: Hopper HQ and similar apps allow you to schedule and automatically publish Instagram posts, reels and stories in advance. This can save you time and effort, especially if you’re managing multiple accounts or planning a content calendar.
- Analytics: Tracking your Instagram performance is crucial for growing your presence. Many third-party apps provide detailed analytics, including engagement metrics, follower growth, and hashtag performance. These insights can help you refine your content strategy.
- Multi-Account Management: If you’re managing several Instagram or social media accounts, switching between them on the official website or app can be cumbersome. Third-party tools often offer a centralized dashboard for managing multiple accounts efficiently.
- Cross-Platform Compatibility: While the official Instagram website may not offer a seamless experience on Windows 10, third-party apps like Hopper HQ are designed to work across various platforms, ensuring a consistent user experience.
- Security and Reliability: Reputable third-party apps prioritize security and reliability, providing you with a safe environment for managing your Instagram accounts. Make sure to choose a trusted option like Hopper HQ to avoid potential security risks.
- Customer Support: Many third-party apps offer responsive customer support, which can be valuable if you encounter any issues or have questions about using the tool effectively.

While downloading Instagram to PC with Windows 10 is feasible through workarounds, utilizing an app like Hopper HQ can significantly enhance your Instagram management experience. With added features, scheduling capabilities, analytics, and improved account management, it’s worth considering if you’re serious about leveraging Instagram for personal or business purposes.
here’s how to schedule and post photos straight from your desktop – using Hopper HQ:
For more ways of posting to Instagram from PC or Mac, check out our up-to-date guide here.
Take your social game further with Hopper HQ.
Plan, schedule and auto-post to every channel in one place. Free for 14 days, no card required.